


IoT Platforms are filling gaps
between sensors and data networks. There are number of IoT platforms are
available like IFTTT, Thingspeak, Particle, Firebase and ThingsBoard
for providing option to install IoT application. Here, we are using ThingsBoard to control an LED using Raspberry Pi.
ThingsBoard is an open-source IoT platform
that enables rapid development, management and scaling of IoT projects.
It is an open-source server-side platform that allows you to monitor
and control IoT devices. Thingsboard is free for both personal and
commercial usage, and you can deploy it anywhere. In our previous
projects, we controlled Raspberry pi GPIO with various IOT platform
Now, for controlling the LED using ThingsBoard we will be using paho-mqtt library to establish a connection between Thingsboard platform and Raspberry Pi.
lets starts
required components-
- Raspberrypi
- LED
- Breadboard
- jumperwires
- 220ohm resistor
first of all setup circuit with Raspberrypi. I'm using Raspberrypi 3 B+ you can use any pi board.
- connect cathod(short pin of led) of LED with 220 ohm of resistor
- connect GPIO 17 PIN 11 of PI to anode of LED
- connect another pin of 220ohm resistor with pin 6 of PI
for pin configuration refer pin diagram of pi below

for circuit refer image below

THINGSBOARD ACCOUNT SETUP
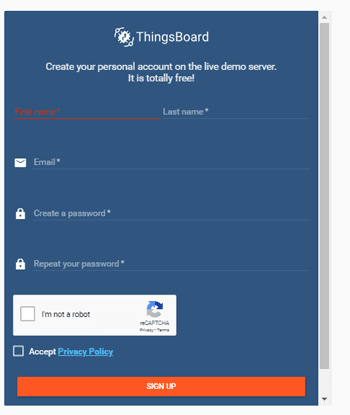
Similar to other IoT platform, we have to create an account to use the features of ThingsBoard. Navigate to https://demo.thingsboard.io/signup to sign up on ThingsBoard.
follow steps below-
-first of all sign up in thingsboard account
- After signing up, click on devices in the left corner of home screen and select Raspberry Pi Demo Device.

After that click on ‘Copy Access Token’ to copy the Token as it will be used in the python code.

After device setup, now create a dashboard on ThingsBoard for Raspberry Pi GPIO. For that click on ‘Dashboard’ and download the demo dashboard given for Rapsberry Pi by clicking on ‘Raspberry Pi GPIO Demo Dashboard’ as shown below:

Now, raspberry pi dashboard for ThingsBoard is ready to use.

Programming Code Explanation of Raspberry Pi for ThingsBoard
First, install the MQTT library for the raspberry pi, by using the below command:
sudo pip install paho-mqtt
Then mention the libraries that need to be included at the beginning of the python code:
import paho.mqtt.client as mqtt
import RPi.GPIO as GPIO
import json
Next command will use for details about of ThingsBoard. Enter the access token that you copied from Thingsboard.
THINGSBOARD_HOST = 'demo.thingsboard.io'
ACCESS_TOKEN = 'Your Access Token'
Below commands are used to send a message to the client when gets connected.
def on_connect(client, userdata, rc, *extra_params):
print('Connected with result code ' + str(rc))
# Subscribing to receive RPC requests
client.subscribe('v1/devices/me/rpc/request/+')
# Sending current GPIO status
client.publish('v1/devices/me/attributes', get_gpio_status(), 1)
These commands will be used to print the response and receive the GPIO status from the server.
def on_message(client, userdata, msg):
print 'Topic: ' + msg.topic + '\nMessage: ' + str(msg.payload)
# Decode JSON request
data = json.loads(msg.payload)
# Check request method
if data['method'] == 'getGpioStatus':
# Reply with GPIO status
client.publish(msg.topic.replace('request', 'response'), get_gpio_status(), 1)
elif data['method'] == 'setGpioStatus':
Now to connect with Thingsboard at 1883 port below code is used,
client.connect(THINGSBOARD_HOST, 1883, 60)
try:
client.loop_forever()
except KeyboardInterrupt:
GPIO.cleanup()
Testing LED Control from ThingsBoard using Pi
Make a new file using the below command then paste the code given at the end for controlling LED using ThingsBoard and Raspberry Pi.
Sudo Python gpio.py
Now, paste the code into the above created file and run this file using the below command:
Python gpio.py
Now run the python code using the following command:
Python gpio.py
After this navigate to the Thingsboard
dashboard and click on GPIO 17 to on/off LED. Response from the server
will be printed on Raspberry Pi terminal.

Code
import paho.mqtt.client as mqtt
import RPi.GPIO as GPIO
import json
THINGSBOARD_HOST = 'demo.thingsboard.io'
ACCESS_TOKEN = 'Your Access Token'
# Set the GPIO as LOW
gpio_state = {11: False}
# The callback for when the client receives a CONNACK response from the server.
def on_connect(client, userdata, rc, *extra_params):
print('Connected with result code ' + str(rc))
# Subscribing to receive RPC requests
client.subscribe('v1/devices/me/rpc/request/+')
# Sending current GPIO status
client.publish('v1/devices/me/attributes', get_gpio_status(), 1)
# The callback for when a PUBLISH message is received from the server.
def on_message(client, userdata, msg):
print 'Topic: ' + msg.topic + '\nMessage: ' + str(msg.payload)
# Decode JSON request
data = json.loads(msg.payload)
# Check request method
if data['method'] == 'getGpioStatus':
# Reply with GPIO status
client.publish(msg.topic.replace('request', 'response'), get_gpio_status(), 1)
elif data['method'] == 'setGpioStatus':
# Update GPIO status and reply
set_gpio_status(data['params']['pin'], data['params']['enabled'])
client.publish(msg.topic.replace('request', 'response'), get_gpio_status(), 1)
client.publish('v1/devices/me/attributes', get_gpio_status(), 1)
def get_gpio_status():
# Encode GPIOs state to json
return json.dumps(gpio_state)
def set_gpio_status(pin, status):
# Output GPIOs state
GPIO.output(pin, GPIO.HIGH if status else GPIO.LOW)
# Update GPIOs state
gpio_state[pin] = status
# Using board GPIO layout
GPIO.setmode(GPIO.BOARD)
for pin in gpio_state:
# Set output mode for all GPIO pins
GPIO.setup(pin, GPIO.OUT)
client = mqtt.Client()
# Register connect callback
client.on_connect = on_connect
# Registed publish message callback
client.on_message = on_message
# Set access token
client.username_pw_set(ACCESS_TOKEN)
# Connect to ThingsBoard using default MQTT port and 60 seconds keepalive interval
client.connect(THINGSBOARD_HOST, 1883, 60)
try:
client.loop_forever()
except KeyboardInterrupt:
GPIO.cleanup()
0 Comments